
There’s something so satisfying about a perfectly smooth, glossy icing that really makes sugar cookies shine. This Sugar Cookie Icing Recipe has been my go-to for adding that beautiful finish—gliding on easy but drying just right with a subtle vanilla sweetness that you and your friends will adore.

Why You’ll Love This Recipe
- Easy to Make: Just a handful of simple ingredients come together in minutes, no specialized tools required.
- Perfect Consistency Control: You can adjust the thickness for outlining or flooding with intuitive milk additions.
- Glossy, Professional Finish: The light corn syrup gives your cookies that gorgeous shine that looks store-bought.
- Versatile Color Customization: Easily divide and color your icing to make each batch unique and festive.
 Save
Ingredients You’ll Need
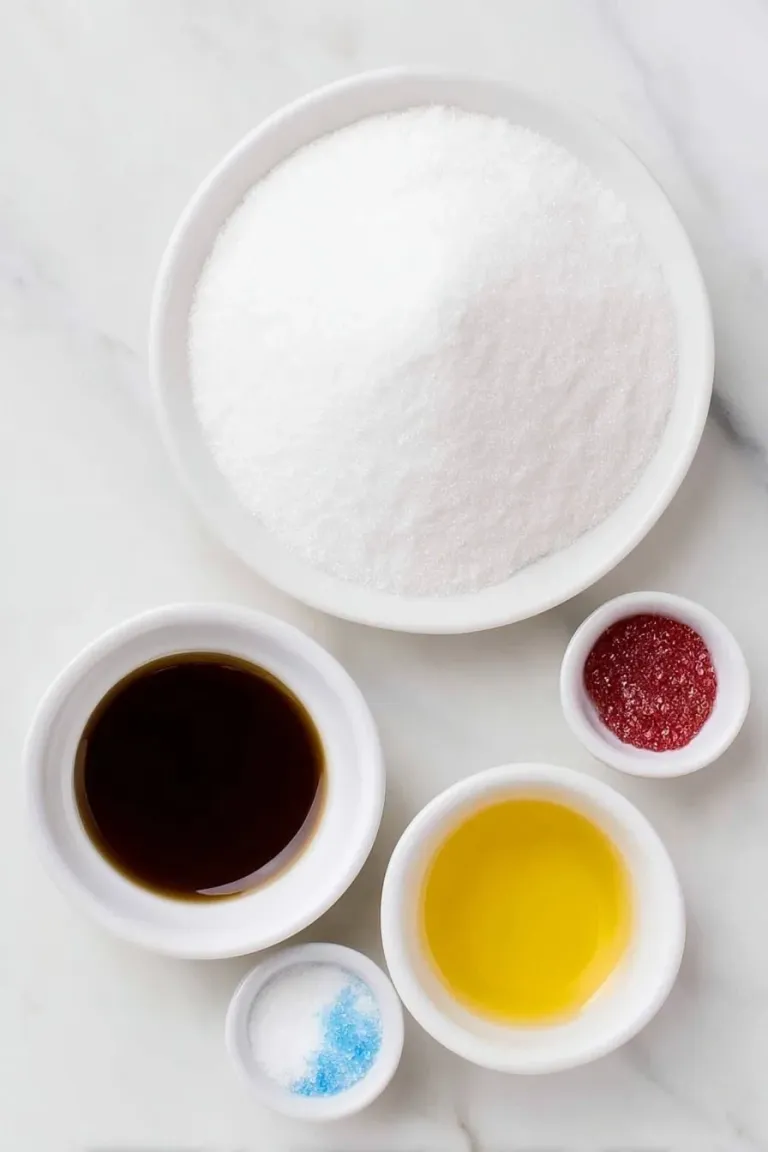
Each ingredient plays a crucial role in getting that smooth, spreadable icing that sets beautifully. Here’s a quick rundown on what you’ll want and why it works so well.
 Save
- Powdered sugar: Make sure to sift it so your icing is silky smooth without any lumps.
- Milk: I like using whole milk, but any milk works—the key is to add it gradually to control consistency.
- Light corn syrup: This is my secret weapon for that glossy finish and to keep the icing from drying too brittle.
- Vanilla extract: Adds that warm, comforting flavor that pairs perfectly with sugar cookies.
- Food coloring (optional): Gel colors are my favorite because they give vibrant hues without thinning the icing.
Variations
I love how versatile this Sugar Cookie Icing Recipe is. Over time, I’ve played around with flavors and textures that make it uniquely yours—don’t hesitate to get creative!
- Flavor Variations: I sometimes swap vanilla for almond or lemon extract to give a bright twist that my guests always notice and enjoy.
- Texture Adjustments: Adding a tiny pinch of salt can balance the sweetness, especially if you prefer a less sugary finish.
- Dietary Modifications: For dairy-free, you can use almond or oat milk instead of regular milk with equally great results.
- Color Play: For holidays, I’ve mixed frosting colors right on the cookie edges to create fun ombré effects that always wow people.
How to Make Sugar Cookie Icing Recipe
Step 1: Whisk Together Your Base
Start by placing your sifted powdered sugar in a medium bowl. Add 2 tablespoons of milk, light corn syrup, and vanilla extract. Whisk them all together until you get a smooth, glossy mixture. If you notice a few lumps, keep whisking—they’ll disappear as the sugar dissolves. This step sets the stage for that signature silky finish.
Step 2: Adjust Consistency Slowly
This is where the magic happens. Add milk, one teaspoon at a time, mixing thoroughly after each addition. For outlining cookies, you want a thicker icing that holds its shape, while for flooding (filling inside the outlines), go for a thinner texture that flows easily. I usually test with a knife or spatula—if it holds a soft peak it’s perfect for outlines; if it runs slowly off the spoon, it’s great for flooding.
Step 3: Color and Divide
If you’re going colorful, divide the base icing into smaller bowls. Add gel food coloring—just a drop or two—and stir until your desired shade is reached. It’s easier to add more color than fix over-colored icing, so go slow. This division is also great for quick decorating because you’ve got everything ready to go.
Step 4: Decorate and Let Set
Transfer your icing to piping bags or squeeze bottles for precision. If that feels too fancy, a simple spoon or butter knife works beautifully too. Spread or pipe your designs onto fully cooled sugar cookies and then let them dry at room temperature for 2 to 3 hours. Patience here pays off—the icing will harden to that perfect glossy texture you’re aiming for.
Pro Tips for Making Sugar Cookie Icing Recipe
- Sift Your Powdered Sugar: I learned the hard way that skipping this step means struggling with uneven icing—take the extra time, it’s worth it.
- Add Milk Gradually: Adding milk by teaspoons helps you avoid making the icing too runny, which can be frustrating to fix later.
- Use Light Corn Syrup: This simple ingredient gives a beautiful shine and keeps the icing from becoming chalky or cracking.
- Store Leftover Icing Properly: Keeping it airtight in the fridge and stirring in a few drops of milk before reuse prevents thickening and ensures smooth texture.
How to Serve Sugar Cookie Icing Recipe
Garnishes
I’m a big fan of adding a little sparkle! Sprinkles or edible glitter on top of wet icing add a layer of fun and texture. Sometimes I toss on tiny sugar pearls for special occasions—it makes cookies look elegant but still totally inviting.
Side Dishes
Serving these cookies alongside a warm cup of tea or a frothy mug of hot chocolate takes the experience over the top. For parties, I’ve paired them with fresh fruit platters and soft cheeses for a delightful sweet-savory combo.
Creative Ways to Present
For birthdays or holidays, I like arranging iced sugar cookies in pretty boxes or tying small stacks with ribbon for gifting. You can also pipe messages or monograms with the thicker outline icing for a personal touch that always impresses guests.
Make Ahead and Storage
Storing Leftovers
Leftover icing keeps well in an airtight container in the fridge for up to three days. When you’re ready to use it again, just let it come to room temperature and stir in a few drops of milk if it’s thickened. I find this refreshes the consistency perfectly for decorating like new.
Freezing
While I haven’t frozen the icing by itself, I have frozen decorated cookies successfully. Just be sure the icing has fully set first, and thaw cookies in the fridge to avoid condensation impacting the finish.
Reheating
I typically don’t reheat the icing itself. For cookies, just bring them to room temperature naturally for the best texture. If your icing softens after storage, a gentle stir helps bring back that smooth look without any heat.
Final Thoughts
I absolutely love how this Sugar Cookie Icing Recipe elevates a simple cookie to something truly special. When I first tried it, I was amazed at how easy it was to get professional-looking results right at home. Whether it’s a holiday party or a casual treat, I know you’ll enjoy playing around with the colors and designs as much as I do. Give it a go—you might just find your new favorite frosting formula!